By Erin Roberts
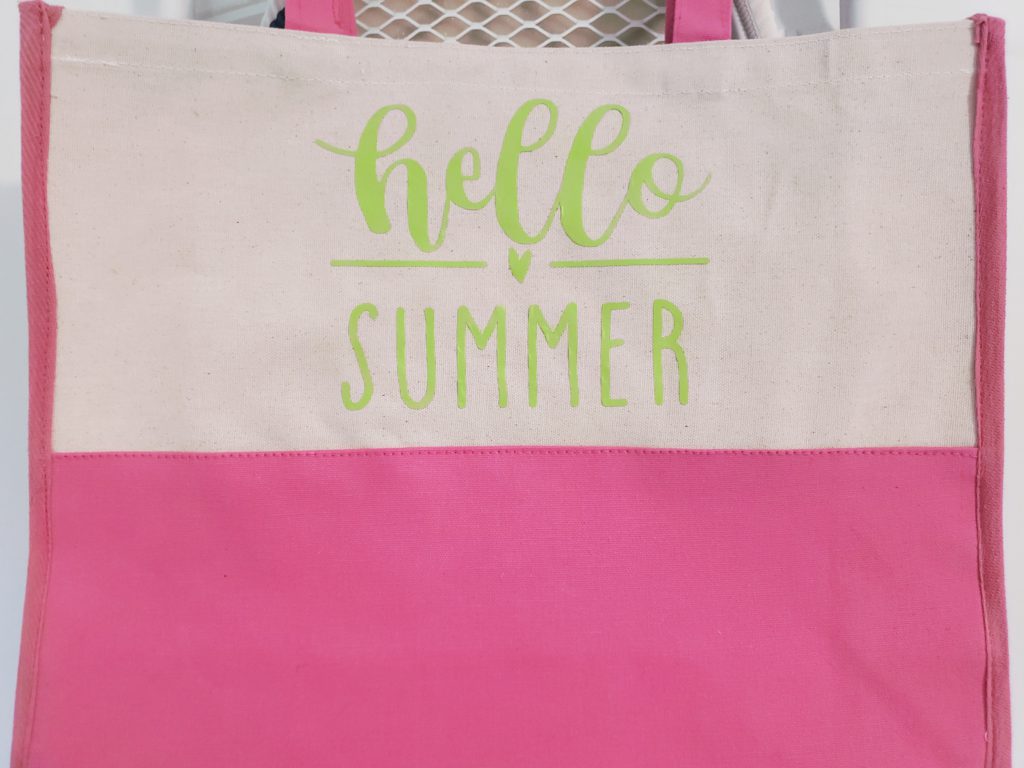
Hey everyone! So today I’ll be giving a step-by-step tutorial of how to make a summer-themed tote bag. These are great for the beach, pool, grocery store, park, pretty much anywhere, especially if you have kids!
I got my bag from Hobby Lobby when it was on sale. I think I only paid about $3! The material of the bag I am using is canvas, which is not ideal for iron-on, but it is what I currently have on hand. You can find blank bags at pretty much any craft store, on Amazon, Walmart, or even at Goodwill or other thrift stores! Just be sure the bag is NOT made from vinyl/faux leather, plastic, nylon, or anything similar because it will melt when you iron it. My vinyl also came from Hobby Lobby.
As far as buying from a physical store, they seem to have the best deals. Hobby Lobby alternates weeks for their sale items. So their vinyl will be on sale one week, then not, then on sale again the following week, etc. They do carry the “Cricut” brand vinyl, but it is fairly expensive. I use their “The Paper Studio” brand, and I have not had any issues. You can also buy removable vinyl by the sheet (which is less than a dollar!). Amazon is also a great resource for vinyl. Just be sure to read customer reviews before purchasing, and be sure you are ordering the correct type! With vinyl, you get what you pay for. Some people try to use Dollar Tree or “discount” vinyl, and it almost always results in disaster. It is worth it to pay a little more up front rather than have a ruined project.
Materials Needed:
- Bag/Tote
- Iron-On Vinyl in the color of your choice
- Iron or Heat Press
- Cutting Machine (Cricut, Silhouette, Scan ‘N Cut, etc.)
- Regular tack cutting mat
- Transfer Tape
- Weeding Tool
- Scissors
- Spatula/Smoother
Step 1: Select which design and what colors you want to use.
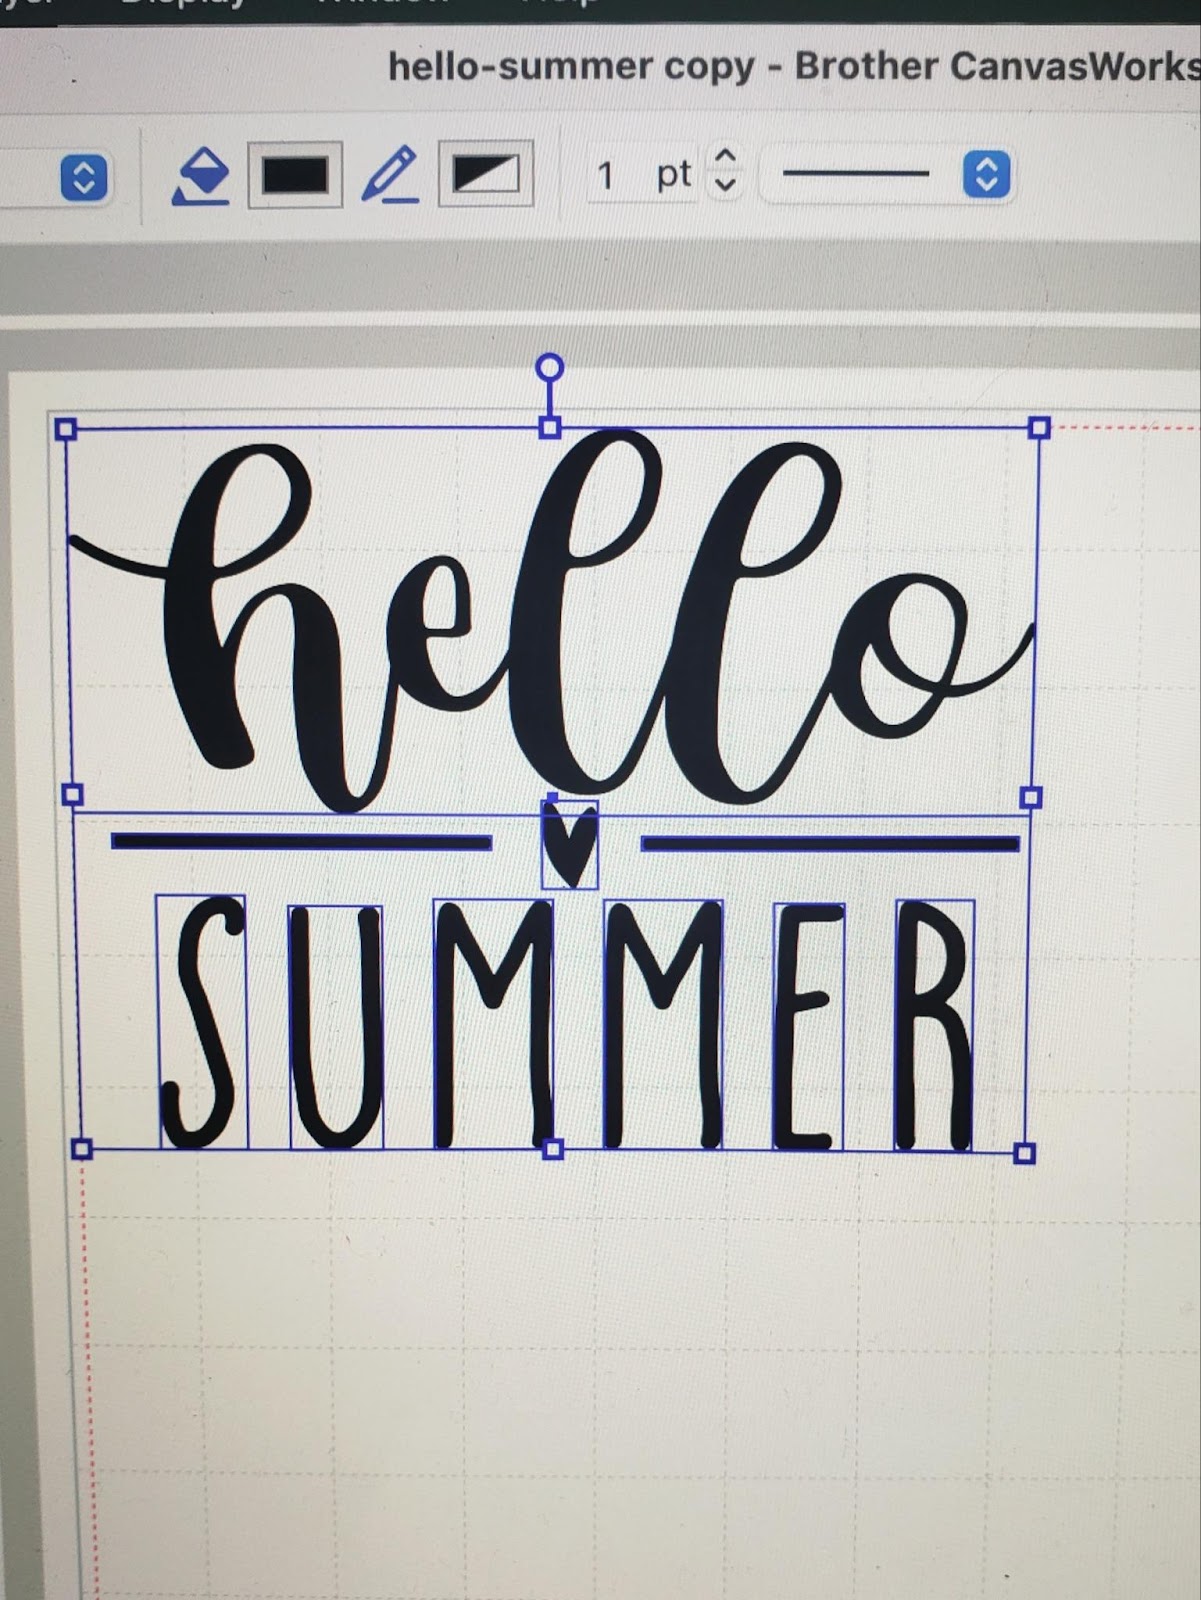
I am using a design from www.lovesvg.com from their “Summer Bundle.” Here is a direct link to that bundle: https://lovesvg.com/product/the-summer-bundle/ref/erob2319/
And be sure to sign up for their emails for great deals! If you do a lot of svg-related work, definitely look into their subscription! They also have a TON of free designs, and, if you sign up for their emails, you get a new freebie every day!
Step 2: Prepare your design for cutting and measure your bag.
If you’re using a design with multiple colors, then you will have to import it into some type of software (Design Space, Canvas Workspace, etc.) to break it apart. Contrary to what many people think, you can not simply send the design to the machine and press “go.” There is a fairly significant amount of prep-work you have to do before you can cut. However, the more projects you do, the faster you’ll get! YouTube is a great resource for how-to videos.
Depending on which software you use, you may be able to load multiple “mats” at once, or you might have to do them individually. I am using a Brother Scan N’ Cut CM350. It is an older model (I believe it is now discontinued), but it is still a work horse! Cricut is definitely the most popular brand of home cutting machines, but I have been very pleased with my Scan N’ Cut! The new models of Scan N’ Cuts are AMAZING, but they are definitely out of my price range! I have also heard good things about Silhouette cutters.
Since we’re using iron-on, BE SURE TO MIRROR YOUR DESIGN. If you take away nothing else from this article, PLEASE take this! So many people forget to mirror, and then you just have to throw your vinyl in the trash! (Don’t ask me how I know this…) The “mirror image” icon usually looks like two side-by-side triangles, one black and one white, with a line between them. Once your design is mirrored, it will look backwards, and it will cut backwards. That is how it is supposed to be!
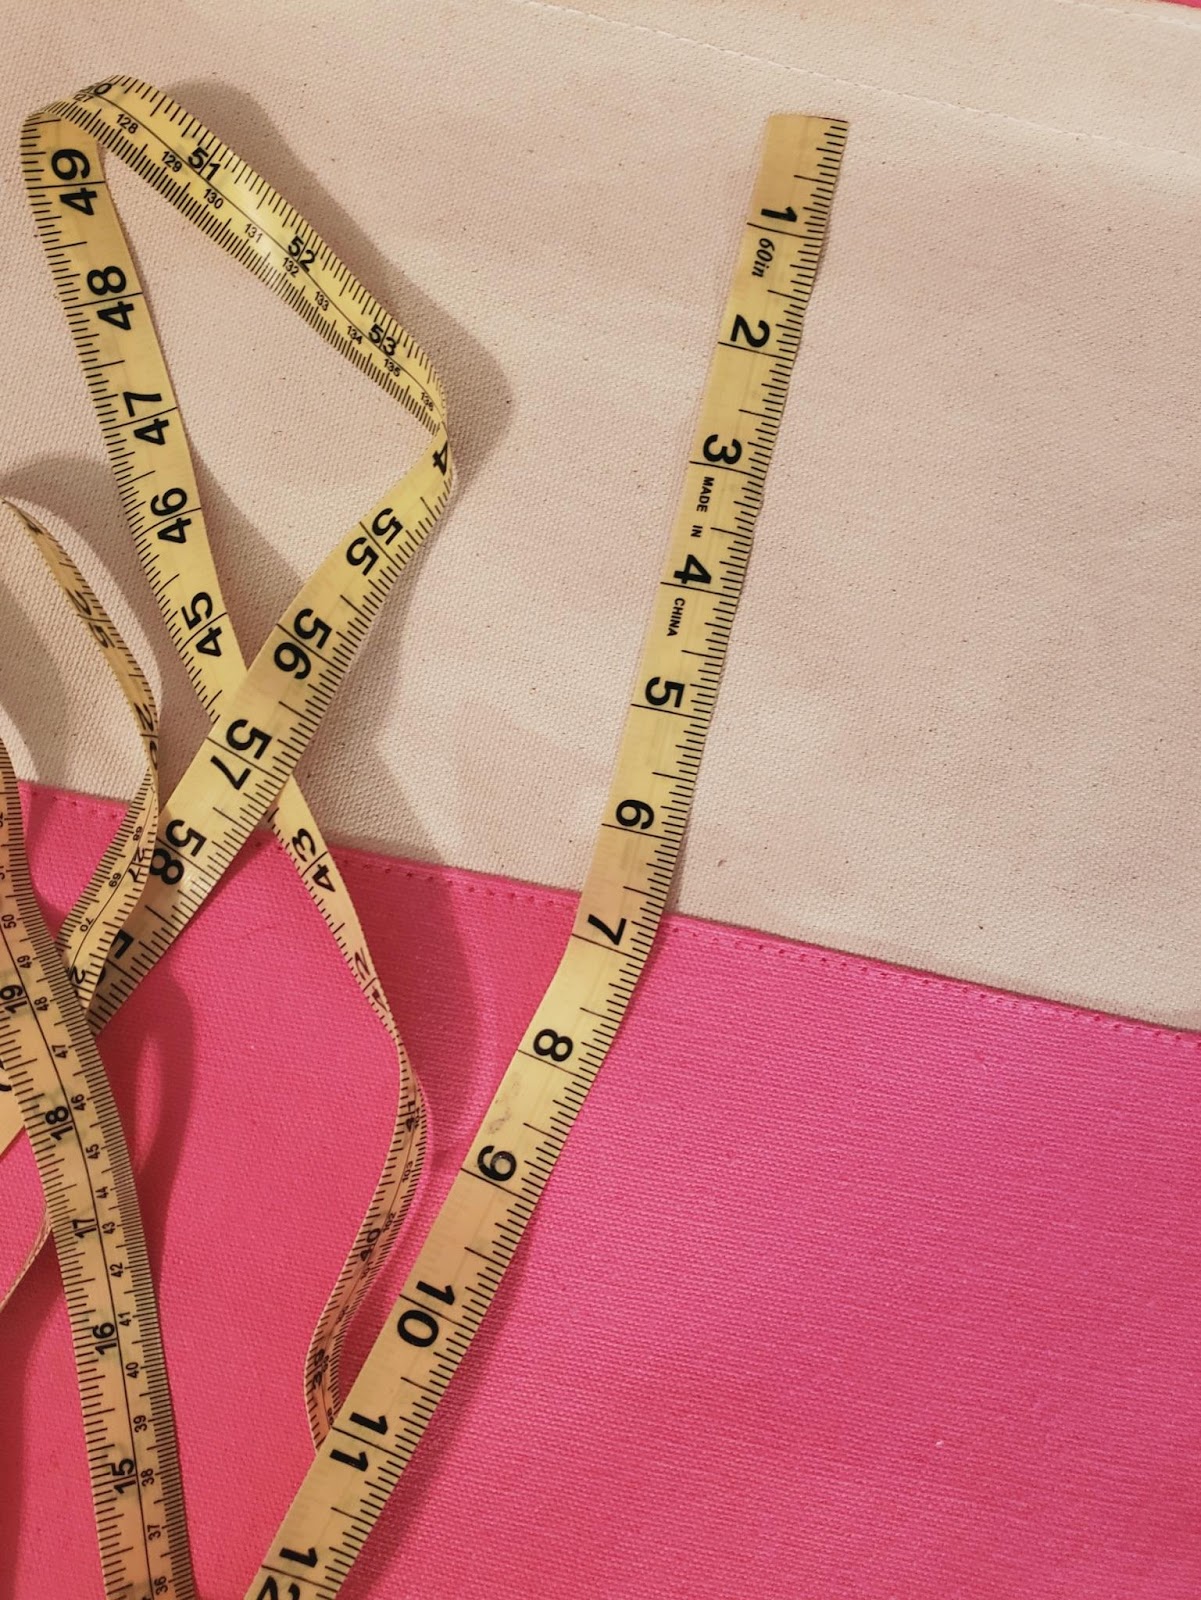
Also, be sure to measure your bag! You need to know how big to cut the design so it won’t be too big or too small. When in doubt, just remember that on the cutting mats, one square equals one inch.
Step 3: Cut your design.
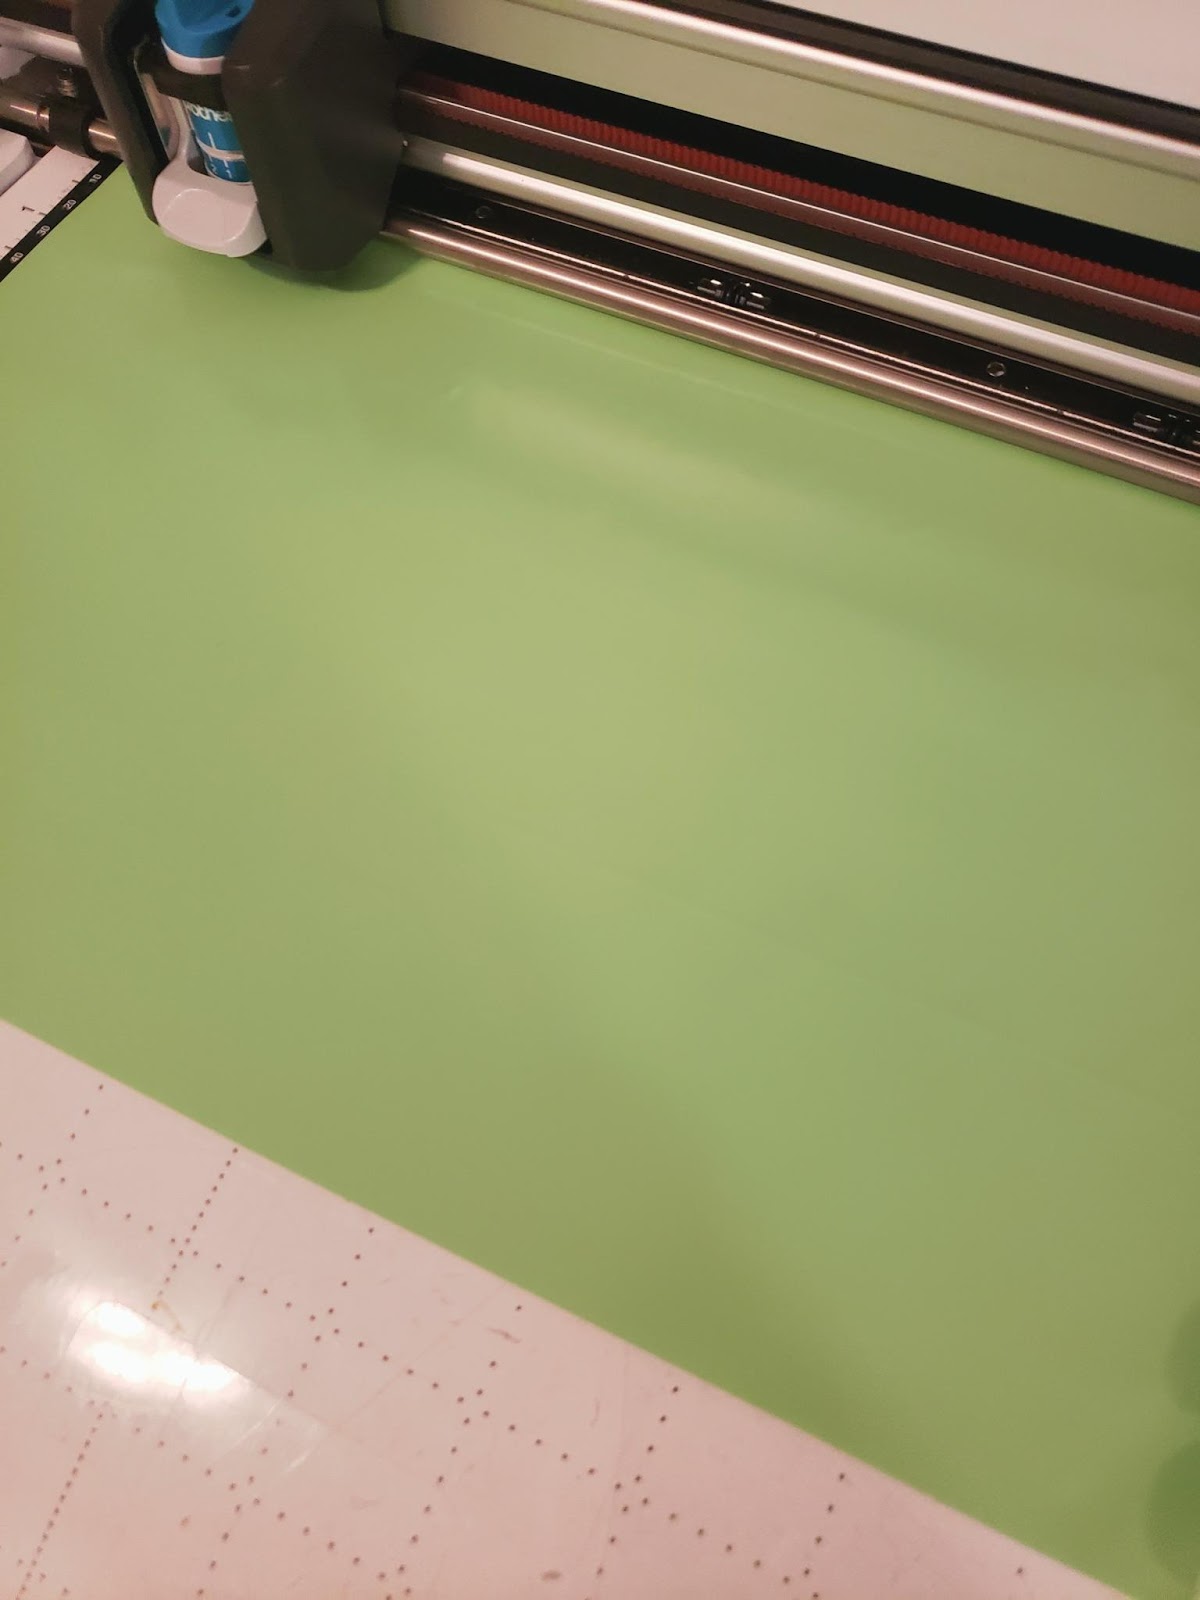
Place your iron-on vinyl FACE DOWN on your mat. The shiny side should be DOWN. Since you have to cut in reverse for iron-on, that is why you must mirror. If your design is only one color, then you will only need to cut one time. If you are using multiple colors, you will have to cut multiple times (depending on size/machine). The design I am using is only one color/layer, so I will only need one color of vinyl and to only cut once.
Be sure your vinyl is adhered to your may properly, with no creases, wrinkles, or bent edges. If your vinyl is not flat, your design will not cut correctly and you will end up having to trash your project! Always double check to be sure everything is good. Load your mat into your machine and cut your design. Be sure your blade is set correctly, you don’t want to cut through to the mat! Some machines have a dial that adjusts your blade, so simply turn it to the “iron-on” setting. My machine has a manually adjustable blade, so I just refer to the chart I have that tells me which blade setting for which material.
Step 4: Weed your design.
Weed (remove) any unnecessary pieces from the vinyl you have just cut. Move slowly and gently so you don’t rip off any of your design. Sometimes it is helpful to hold it up and turn it front-facing (like looking through a window) so you can be sure you’re getting the correct pieces. Please excuse my messy cutting mat! It has seen a lot of crafting!

Step 5: Place design and iron.
Turn your design so that the “ugly” side is down (but don’t stick it to anything!). Your design should now look correct (not backwards). Align your design on your bag and gently stick it down. You can use a heat press if you have one, but I do not, so I am just using my iron.

Iron on your vinyl. The clear sheet on top WILL REMAIN IN PLACE while you iron. Be sure to read the instructions that came with your vinyl so you know what heat setting, pressure, and length of time to use. Once you have met all requirements per your instructions, SLOWLY begin to lift up the clear film. If you start to pull it up and your vinyl is not adhered, gently replace the film and iron again. Once you remove the film, congrats! You’re done! Just remember, do NOT iron directly onto the vinyl. It will melt all over your iron/heat press and ruin your project. Be sure to let your vinyl cool completely before use.
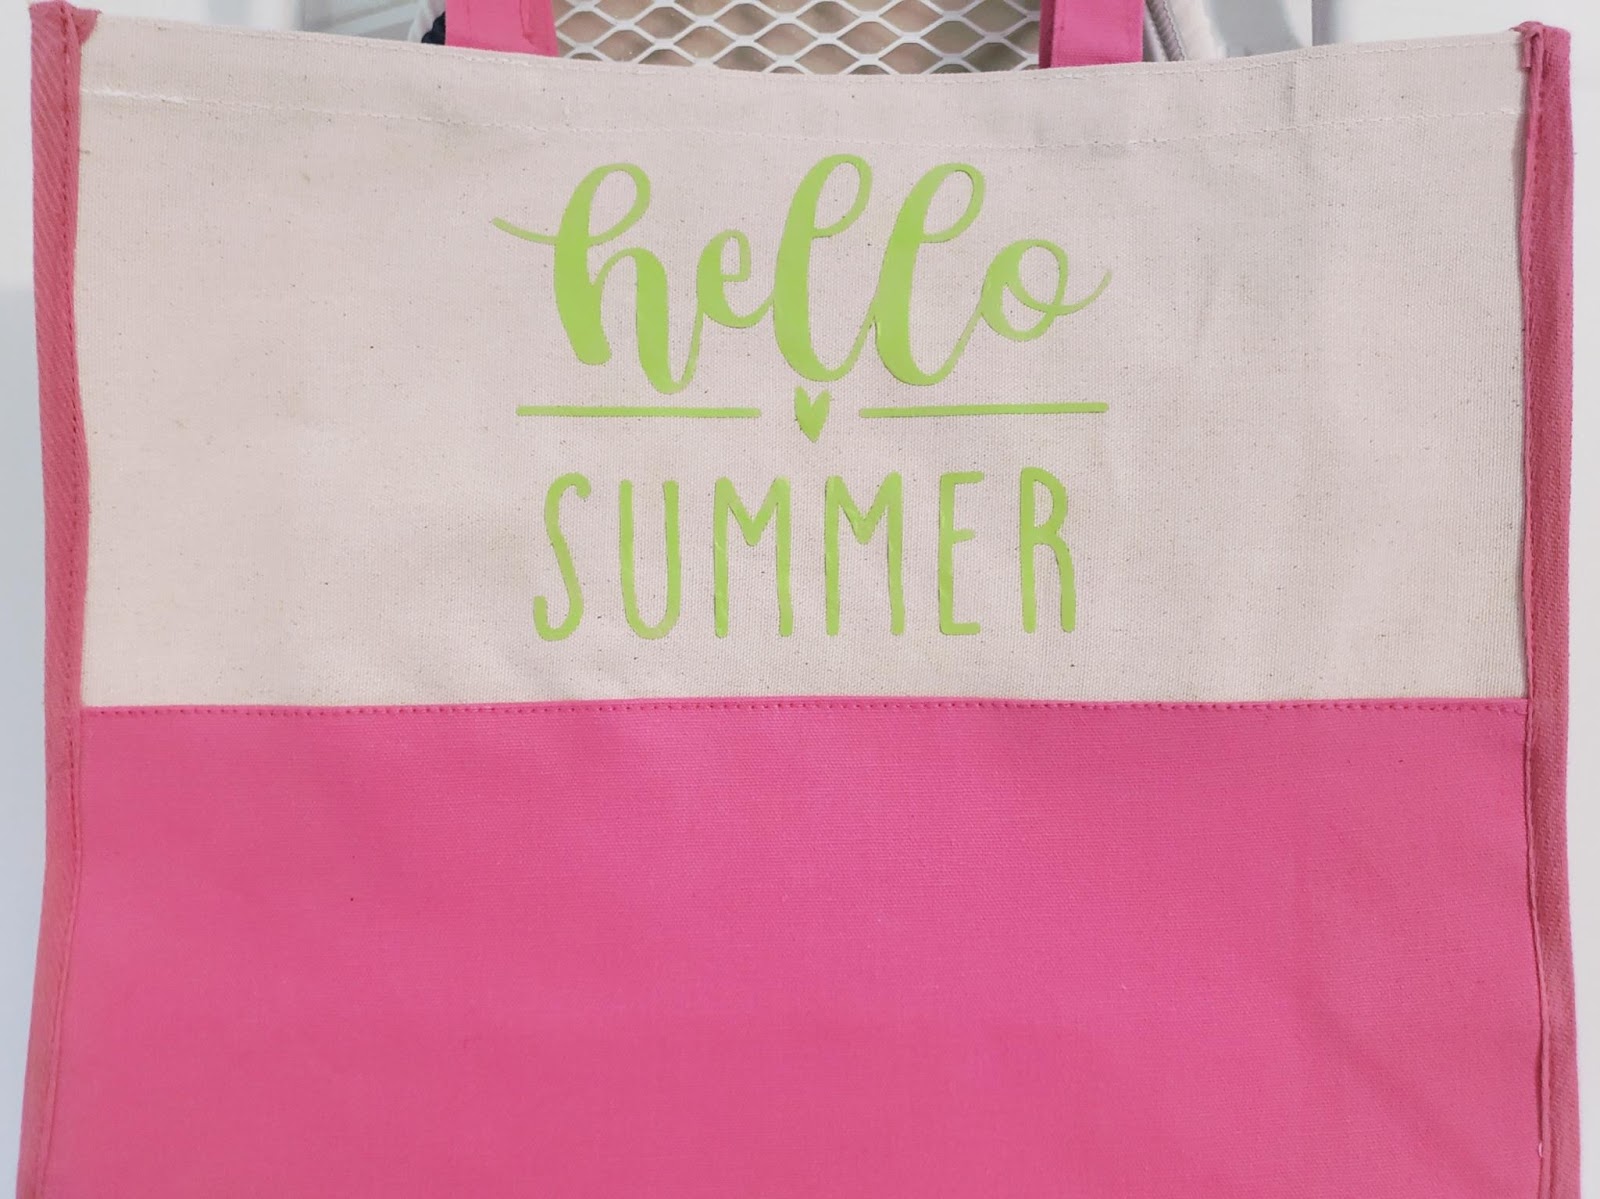
As I mentioned earlier, thick canvas is not the ideal material to use for iron-on, because it is hard to get the vinyl to stick evenly. But, I think it still turned out good!
I hope you found this tutorial helpful! I am always learning more and more, and I look forward to sharing more with you in the future! Remember to head over to https://lovesvg.com/product/the-summer-bundle/ref/erob2319/ to get the Summer Bundle, which includes the design that I used! Have a great summer!