New to the Cricut community? We are prepared to assist. In this article, we’ll go through in great detail how to download SVG files for your Cricut and use them in Cricut Design Space. If you are just starting your crafting small business, you can check on How I started my crafting journey using LoveSVG files.

STEP 1: DOWNLOAD SVG CUT FILES FOR CRICUT FROM LOVESVG.COM

STEP 2: UNZIP THE ZIP FILE
Unzip the Zip File (Mac)
Double-click the compressed (zipped) folder in your downloads folder (or wherever you downloaded the file) to open it. By default, the compressed SVG file will unzip in the same place as the zipped folder.
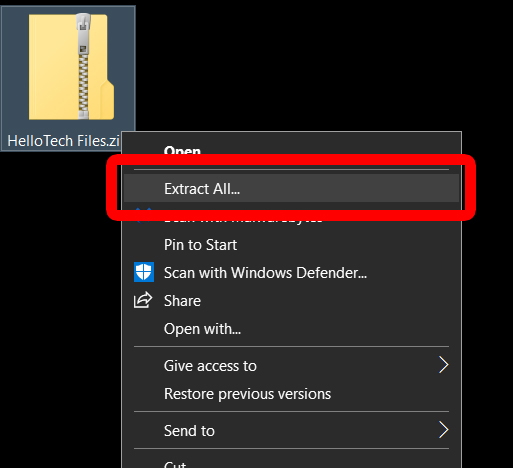
Unzip the Zip File (Windows)
Right-click the compressed (zipped) folder to open it. From the menu, choose Extract All. You can choose a different location by clicking the Browse button instead of the default location where the compressed files will extract, which is the same place as the zipped folder.
Check the Show extracted files when complete option. Click Extract.
STEP 3: UPLOADING THE SVG INTO THE CRICUT DESIGN SPACE
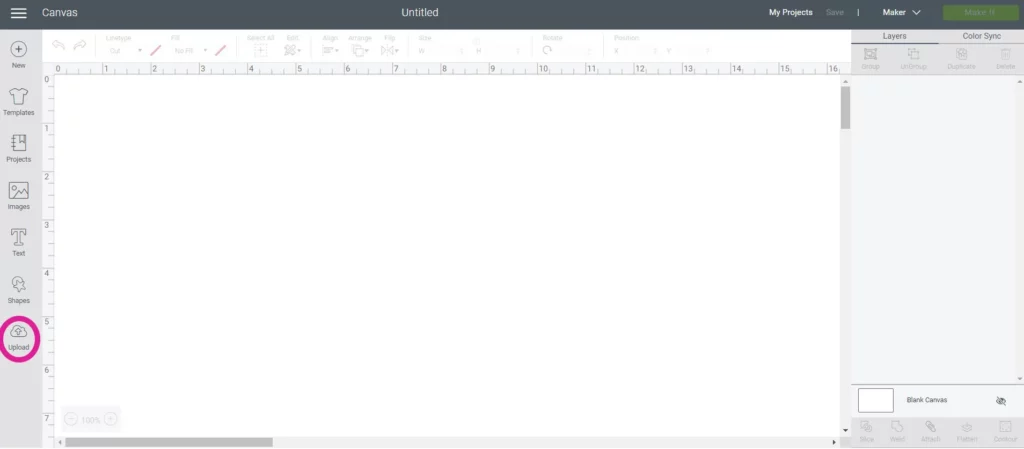
Open a new project in Design Space to create a blank canvas. In the panel on the left, select Upload. Click on the Upload Image button.
STEP 4: STARTING A PROJECT IN CRICUT DESIGN SPACE
Your SVG file has now been uploaded to Design Space and is visible in the Recently uploaded images section at the top. Click Insert Images after choosing your new image. To upload an SVG file, click Browse and choose it, or drag & drop it from your finder window. To complete submitting your file to Design Space, click Save. If you’d like, you can rename your file or add tags for subsequent, simple searching.
STEP 5: Setting Up the File for Cutting
Several selectable layers from your SVG file will now display on your empty canvas in the right panel. The file is automatically sized correctly for the project it belongs to. Unless you wish to make it smaller or larger than our project, resizing shouldn’t be required. UnGroup all of your layers while the group is selected to get ready for cutting. You will be able to pick each layer specifically thanks to this.
Secret Layers
To conceal a layer, click the eye icon. Every SVG file downloaded from our website has a layer including a disclaimer. This layer may also contain information about the project file, such as where the grain lines should go when cutting crepe or what cutting setting to use. Before cutting, cover this layer.
A scoreline’s setting
If applicable, score lines will be shown in the file as solid black lines. The score can be selected from the new window that appears after clicking the layer’s scissor icon. The lines will turn into dotted gray lines.
Putting Score Lines on
To hold the layer in place for cutting, attach the score lines to the layer that you want the machine to score. Select the cut layer to attach the score line to while holding down the Shift or Command key. The canvas’ image layers can also be clicked and moved around. Both levels will be made more visible. At the layer panel’s bottom, click the Attach symbol. At the top of the layers panel, the layers will now be grouped.
Step 6: Cut out your project.
The large green “Make It” button in the top right corner of your project canvas is now available for you to click on. To avoid having to set up your file and all those annoying score lines again, you may also save your project first by selecting Save.
On 1212 mats, Design Space will arrange the images according to color. The mat’s graphics will be cut precisely how they are set. If necessary, adjust your images here to make them fit your mat or the material you are cutting better. Put the number of images you wish to cut in the upper left field, then click apply. The mats will all be updated to reflect the change. The drop-down menu on the left allows you to alter the material size that you are cutting as well. To use it with text-weight paper, we altered the size to 8.5 x 11 inches. For cutting out designs for iron-on vinyl, choose the Mirror option.
You are nearly there!
Click an image on the mat to choose it and move it around any way you’d like. The image can be rotated by clicking the circle arrow in the top right corner, moved to a different mat, or hidden by clicking the three dots in the top left corner. Click Continue in the bottom right corner when you are prepared to cut.
By turning the machine’s dial or selecting it from the drop-down menu, choose the suitable material setting (Cricut Maker only). Setting it one level higher than the material you are using is what we advised. To load and cut your mats, simply adhere to the on-screen instructions.
Would you want to view a video instead?
Check out this Tutorial on How to Use Files for Cricut.
You can download over 5000 FREE SVG Cut Files from here, for commercial use.